Volgers

zondag 27 juli 2014

Kraftin' Kimmie Stamps Magical Mega Krop

                           Hi everyone!!

Do you want to feel the magic of Halloween with the Krafty girls? Then it's the perfect time to register for our Magical Mega Krop being held this October! Many PRIZES, challenges, SURPRISES, make 'n takes and fun times with the Krafty Girls are scheduled! 
And you can costume yourself too!!

woensdag 23 juli 2014

Wonderful Wednesday: Beauty is all around us!

Hi everyone!

We hope you can play along and as always, it's anything goes!!!
Let's get Krafty!!

Here's my card for today:


The paper is from Kaisercraft and I've used the stamp "A sunshiney day" from Kraftin' Kimmie Stamps. 
She's so cute!!! 

I've made a tutorial how I colored the tree and you can find it HERE!


Here are the colors that I've used:
Skin: E11, 00, 000, R20
Hair: E29, 25, 23, 21
Shirt: B49, 15, 13, 11, 10
Skirt: R89, 85, 83, 81
Socks: BG05, 01, 000
Shoes: W7, 5, 3, 1
Tree: E29, 37, 35, 33, 31
Sky: B00, 000, 000
Clouds: C3, 1, 0
Gras: YG11, 13, 17, G7, 28
Hearts: R59, 37, 35

Did you know you can "like" my page on Facebook?
You can find it HERE!


Now we want to see YOUR creations!
Enter our challenge and let us see your stuff!
 At the end of the month, one winner will be chosen from all the submissions that month and will receive a $20 gift code to the Shop!!! So if there are four Wednesdays, you have FOUR chances to WIN!! What do you think.....wanna WIN?? Let's see your krafty stuff!!

Happy Kraftin'!

maandag 21 juli 2014

Tutorial: how to color a tree!

Hi everyone, 

Today it's me to share with you a little tutorial for Kraftin' Kimmie Stamps
I took step by step pictures from how I color a tree.
For this example I've used a stamp from the adorable "A sunshiney day!" stampset by Cheryl.
Here we go!

Step 1:
Draw some structure in the tree with your lightest color (E31).
Nature is not perfect, so it doesn't matter how you draw them.
Squiggly lines are the most beautiful ones.
Don't worry about the mistakes, you won't see them at the end!

 Step 2:
When you're happy with it, you can redraw the lines with your "real" color (E37)

Step3:
Color with your E35 marker next to your lines, leave enough white space for the others!

Step 4:
Color with your E33 marker next to the one before, leave a little white space.

Step 5:
Fill in  your white spots with the E31 marker.

Step 6:
Now we have to darken it up! I really like to use the E29 or the E59 for this part. 
Go again over your first lines.

Step 7:
Blend the last color out with the E35.

Step 8:
Now it's time for some shadows. Use your E35 and E33 for the shadows on the outsides of the tree. Don't forget the schadows under the arms/hands.

Step 9:
For the finishing touch, blend the spots who are too light or have "lines" of your previous markers.

Step 10:
Your tree is ready!!!

Hope you've had something about this.
We would love to see your colored images and cards with trees, don't forget to share them!

Happy Kraftin'!

zondag 20 juli 2014

Krafty hop: You make my heart sing!!

Hi everyone!

Wooohoo! Today it's time for the Kraftin' Kimmie Stamps releaseday
bloghop!!
Over the last few days in our Krafty Peeks, we have shared lots of AMAZING new stamps from all our artists for our July release! We know these new stamps will inspire you!! We’ve got an adorable new musical kids set from Cheryl called YOU'RE A ROCKSTAR! There's a furry new set from Thais called A KOALA-TY FRIEND! Lastly, we are SO excited to share a picture perfect new stamp set from Annie called....OH, SNAP!


The sketch is this week Deconstructed sketch, I love sketches!!!
The stamp is from the set "you're a rock star!" Kraftin' Kimmie Stamps.
I've used a paperpad from Authentique "Promise"


Copic colours I've used:
Skin: E11, 00, 000, R22, 20
Hair: E59, 37, 35, 33, 31
flower: E85, 83, 81
Short/hairbrush: G28, YG09, 06, 03
E53, 50
YR07, 04, 02, 00
shirt: W5, 3, 1
around the image: YG11
floor: W5, 3, 1

You will get to see ALL of the new images today as you sit back and enjoy our JULY Krafty Hop! As you hop from blog to blog, be sure to leave a comment at each and every stop because one lucky stamper will win a $25 gift card!! When you’re done hoppin’, be sure to head over to the Kraftin’Kimmie shop, because ALL the new images are available NOW! And don't forget...if you NEED it all, we have a Gimme Kimmies Kit which features ALL the new July stamps at a discount!! But only for a limited time!


zaterdag 19 juli 2014

Krafty peeks day 3: play on!

Hi everyone!

Today it's already day three from the Kraftin' Kimmie Peeks. We present you the new set designed by Cheryl, that will make your heart sing, "You're a rockstar!"

And there's also a new challenge and the hostess this week is Sheri.
Her challenge is "anything goes". That's easy, isn't it??
Have some krafty fun and join us this week because we'd LOVE to see your KKS designs. We hope you can play along for your chance to WIN a $10 Gift Certificate to use on ANYTHING you want in the shop!! Wanna win??

Here's my card with one of the stamps 


It's the first time I distressed my paper, I thought it would be fun with the classic instument (violine).
The papers are from an old paperpad from Glitz "Pretty in pink"


Copic colours I've used:
skin: E11, 00, 000, R22, 20
hair: E49, 47, 43, 41
pink: R85, 83, 81, RV10
white shoes: W3, 1, blender
violine: E59, 37, 35, 33, 31
floor: E37, 35, 33
around the image: W1, blender


This is the complete stampset:


All the Krafty Girls and Guests listed below have lots of super FUN designs to show you featuring these awesome new stamps from Cheryl! And while you're hopping around, be sure to leave a comment because we are giving away some stamps!!! You could WIN a gift card to the Kraftin' Kimmie Stamps Shop!!


See you tomorrow for the Krafty hop!!!! 


vrijdag 18 juli 2014

Kraftin' Kimmie Peeks day 2: Snappy Birthday!

Hi everyone!!

Welcome back to Day TWO of the Kraftin' Kimmie Stamps JULY previews!!! We are continuing on with the creativity and fun with a fabulous new Moonlight Whispers stamp set by Annie Rodrigue!! We think you'll agree that this new set is PICTURE PERFECT!!
We are thrilled to present you "Oh, Snap!"
You'll see all the new stampset and the beautiful creations on today's bloghop!


When I first saw this girl from the set, she did be think about Paris. 
I thought to make a Paris inspired card.
The papers are from Authentique "Classique: Pretty" (who has Paris as theme)
I cutted a polaroid-frame with my Silhouette Cameo and I cutted the skyline from Paris. 
The Eiffel tower is a cut from Marianne Design.


Copic colors I've used:
Skin: E11, 00, 000, 0000, R22, 20
Hair and short: 100, W7, 5, 3, 1
Pink: R89, 85, 83, 81, RV10
Blue/green ones: W5, W3, W1, BG15, 11, 10
(I've added the W's to have a better match with the papers)
Socks: W5, 3, 1, blender


Below you will find all the Krafty Girls who have goodies to show you today and while you're visiting their blogs, be sure to leave some love at each stop because one lucky stamper is going to WIN a gift card to the Kraftin' Kimmie Stamps Shop!! Woohoo!!!


donderdag 17 juli 2014

Peeks day 1: Koala-ty friend!

Hi everyone!!

It's that time of the month again, the good part ;-)
Time for the Kraftin' Kimmie Peeks! 
I'm sure you will love this month's stamps, I promise!

We are SO thrilled to share the newest set of furry friend stamps from artist THAIS NARCISO! This super sweet set is called A KOALA-TY FRIEND!!

And here's my card with it, I thought it was perfect to make a babycard with this stamp.


The paper is from Eline Pellinkhof (Marianne Design) "Hello Sweet baby!"
And the flags are from "Noor! Design"


Aren't they cute???

Colours I've used:
Furr: 100, W9, 7, 5, 3, 1
Ears/cheecks: RV11, 10, 000
Tree: E 59, 37, 35, 33, 31
Flowers: R89, 85, 83, 81
Leaves: G28, YG17, 13, 11
Butterflies: BV08, 04, 02

Here's the complete set:


Are you planning to join us for our LIVE ONLINE RELEASE PARTY!!! Hope you can join us for all the fun and excitement and prizes on Saturday night beginning at 6pm EDT!! Hope you can come hang out with the Krafty Girls and Guests!


All the Krafty Girls listed below have lots of super FUN designs to show you featuring these awesome new stamps from Thais! And while you're hopping around, be sure to leave a comment because we are giving away a gift card!!! You could WIN some Krafty $$$ to spend at the shop!!!! {This winner will be announced at the party!}
Happy hoppin'!


Happy birthday!

Hallo iedereen,

Vandaag is het weer mijn beurt op het Colourstock blog  een kaartje te laten zien met de Copic markers. Ga gerust eens kijken op het blog en wordt meteen volger! Zo mis je niets over Copic markers en PanPastels!

Ik vind het altijd leuk om je afbeelding proberen vorm te geven met je Copic markers door je schaduwen aan te brengen op de juiste plaats. Deze digitale stempel van Hannah Lynn vond ik er ideaal voor!
Ik hou van de dikke zwarte lijnen.

Ik heb eerst gezorgd voor mijn schaduwen onder het haar en aan de omtrek van het gezicht.
Daarna kan je gaan bepalen waar en hoe je een neus creëert en welke delen donkerder moeten.


Vandaag wil ik jullie eens tonen hoe je het wangenrood mooi kan laten overlopen in de huidskleur zodat je geen "bollen" krijgt.

Op de volgende foto kan je zien hoe ik met de R20 een basis gelegd heb en het midden heb ik aangestipt met de R22. Daarna weer geblend met de R20.
Nu kan je zien dat de R20 niet mooi overgaat in de huidskleur.


Om een mooie overgang te krijgen kan je de randjes van de blush blenden met het lichtste huidskleur dat je op die plaats hebt gebruikt. In dit geval dus de E000.


En de lippen heb ik zo gedaan:
De onderlip vangt het meeste lip en met een goeie lipglos wordt het licht weerkaatst. Dat probeer ik hier ook te doen.
De bovenste lip enkel onderaan accentueren met het donkerste kleur (R35 in dit geval), bij de onderlip zorg je dat je genoeg wit over laat in het midden.


Uitblenden met de R32


De vorige stappen herhalen totdat je een gewenst resultaat krijgt. Als je een stukje wit laat, krijgt dat een dieper effect (glans).


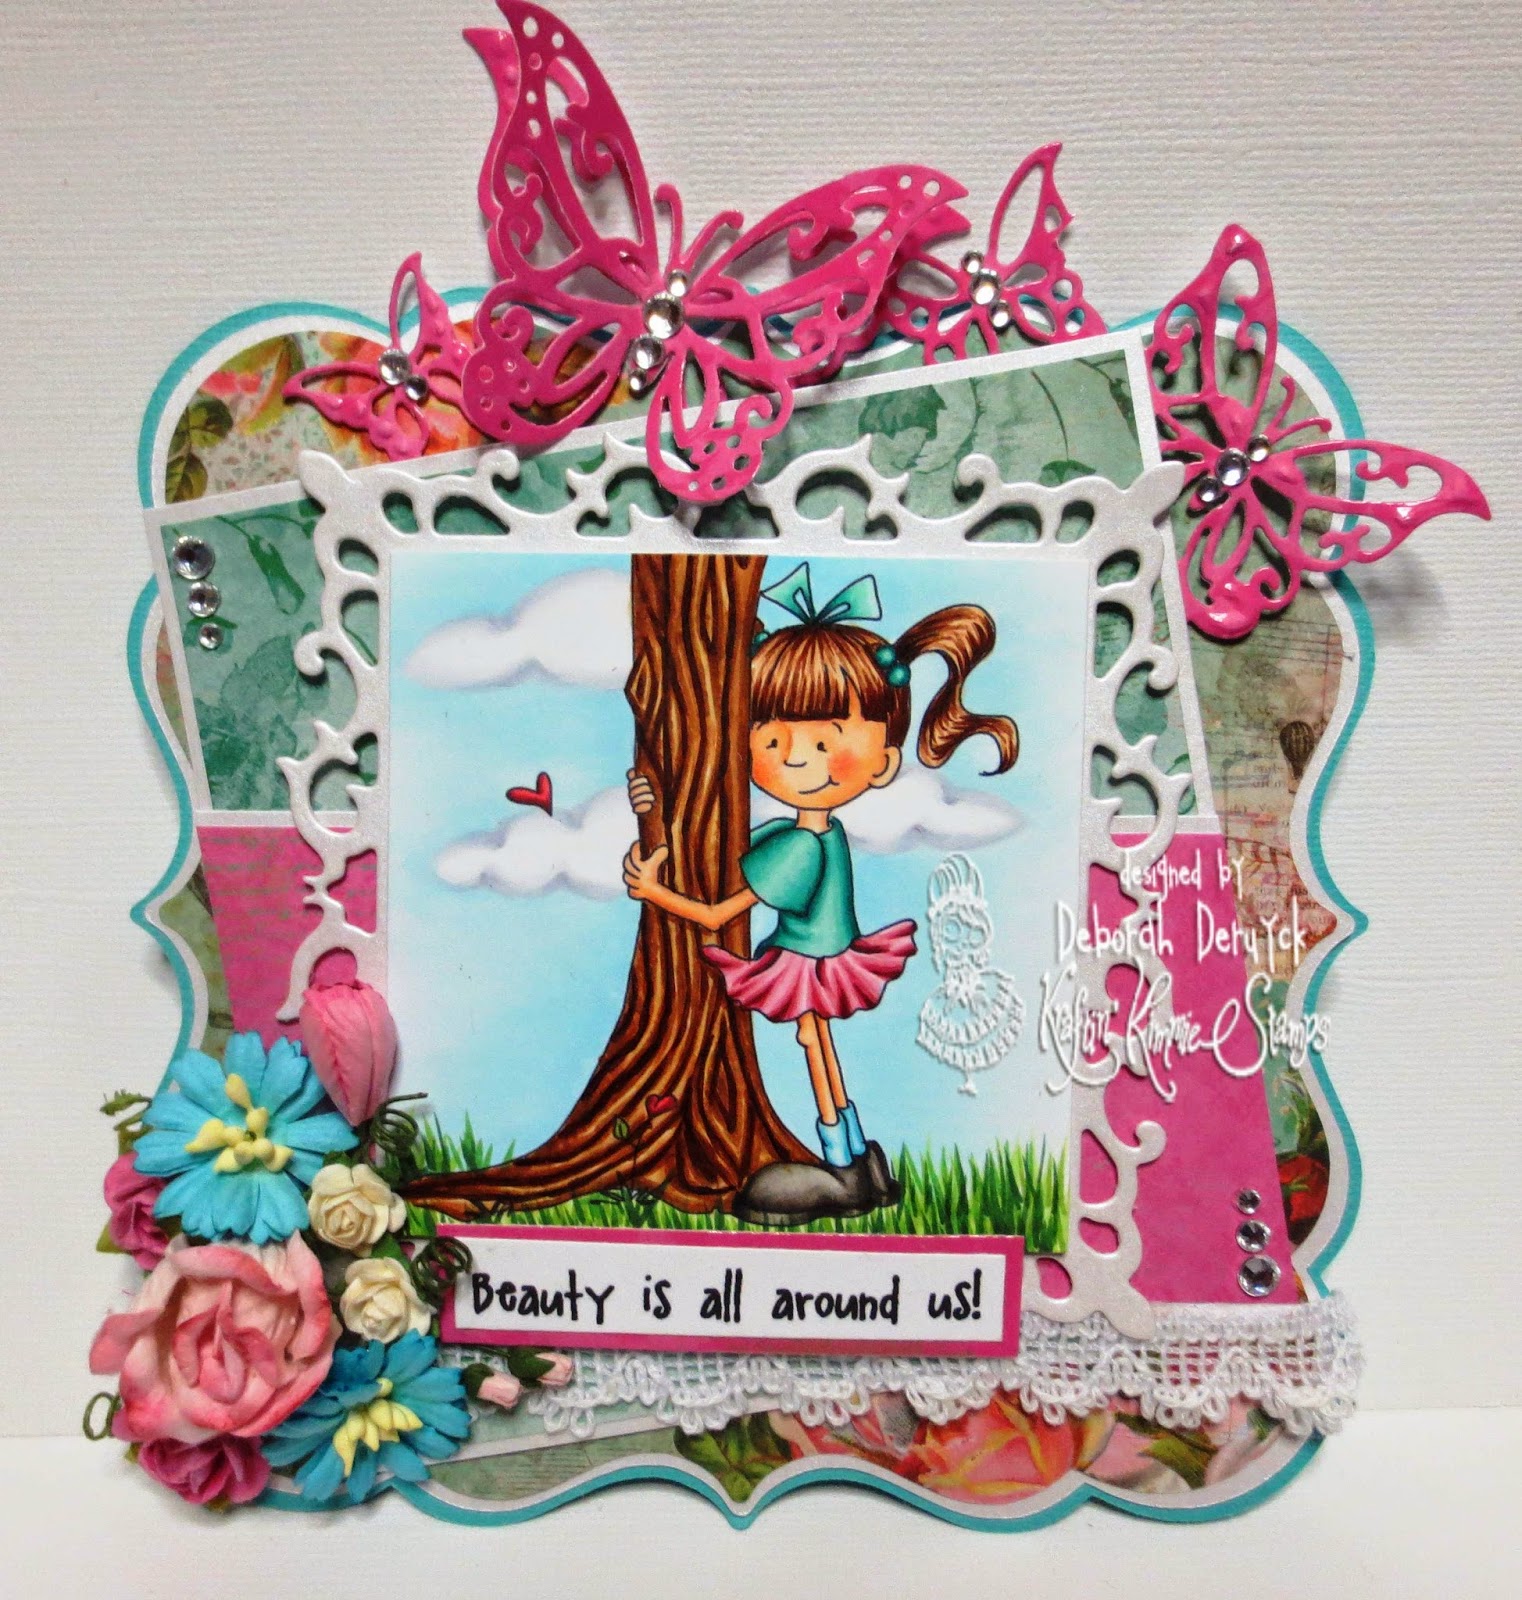
Dit werd dan mijn eindresultaat van mijn kleurwerk. De digitale stempel werd afgedrukt op 13cm hoogte en was een waar genot om te keuren! Ik hoop dat jullie ze mooi vinden!


Omdat het zo'n groot formaat is en omdat het kleurwerk best centraal mag staan, heb ik er een heel eenvoudig kaartje van gemaakt (13 cm breed, 14.5 cm lang)
Enkel nog een designpapiertje en een kantje toegevoegd, ook een tekst kon natuurlijk niet ontbreken.
Deze heb ik met poeder geëmbossed op perkamentpapier.


En ik heb weel een hele resem kleurtjes klaar voor jullie:

huid:

blush:

lippen:

ogen:

haar:

roze bloem:

paars:

blauw bandje:

en als laatste de achtergrondkleur:


Dat was dan mijn extra lange post voor jullie, tot de volgende!